Configuration Assistant: Latency
A Latency Monitor pings a host or hop and measures the round-trip time for a reply to come back, letting you track the latency and responsiveness of a point on your network path. The Configuration Assistant walks you through adding one step by step.
1. Choose the monitor type
Section titled “1. Choose the monitor type”The first screen asks what kind of monitor to add. Choose Latency and click Next.
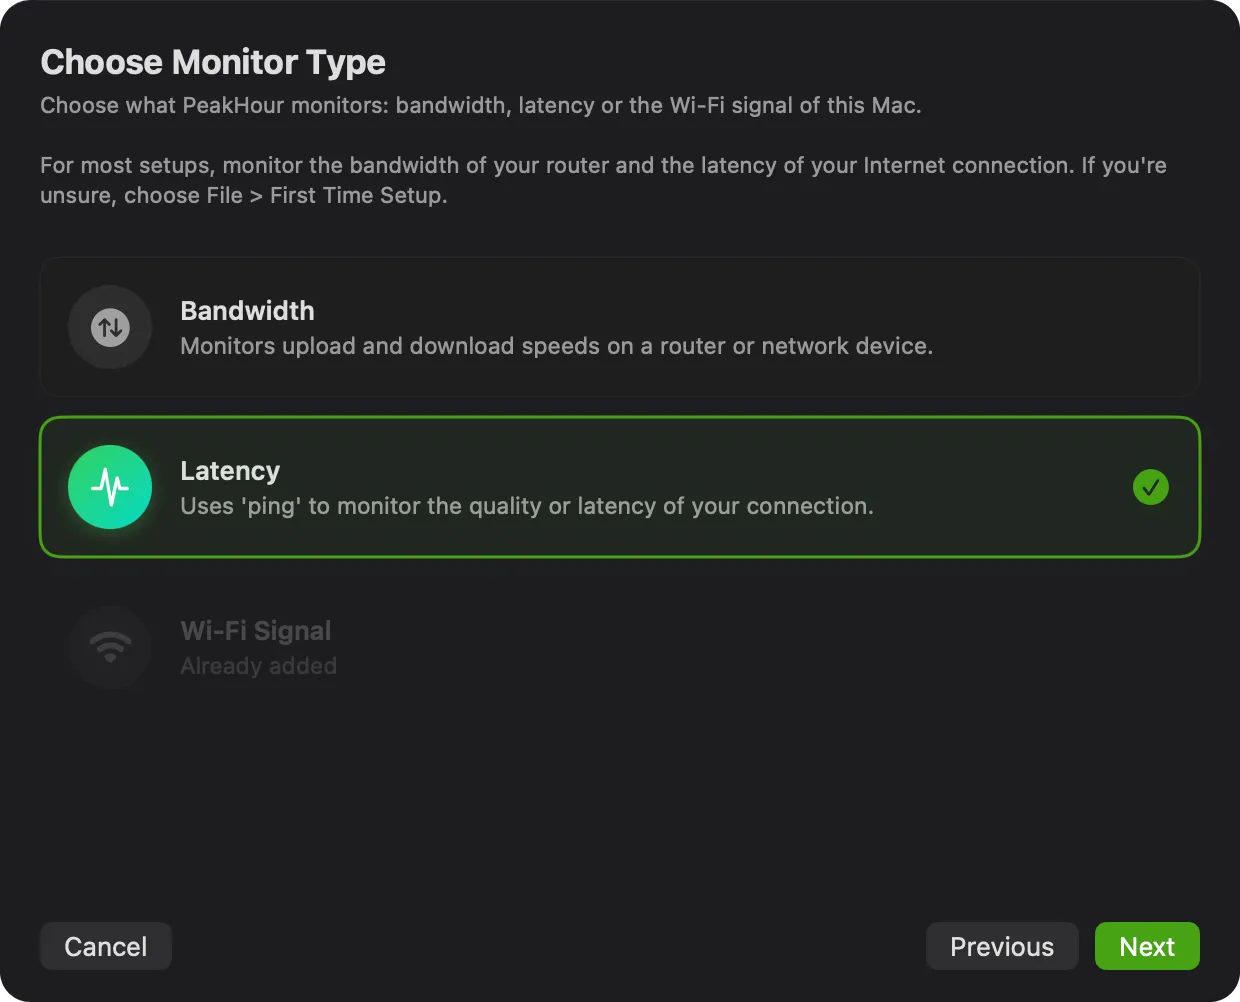
To monitor throughput instead, choose Bandwidth — see Configuration Assistant: Bandwidth Monitor.
2. Choose what to measure
Section titled “2. Choose what to measure”A new latency monitor starts on the What to Measure page: Choose the part of your connection to monitor. The page shows three cards. Each card has a small picture of the path from this Mac to your router, your ISP and the internet. The green part of the picture is the part that the monitor measures.
| Card | What it measures | When to use it |
|---|---|---|
| Internet Site | From your ISP to a site, past your home network. Joins the Internet status of the dashboard. | For a site that you use, so that it counts toward the Internet status. |
| One Host | From this Mac to one host, through your home network. | It shows the delay that your apps feel. |
| Custom | Between any two points on the path. | For a specific router, ISP hop or site. |
- Internet Site is the default, and has the label Recommended. Your home network isn’t part of the result. The monitor becomes one of the Internet sites of the dashboard, for example ISP to Cloudflare.
- One Host measures the whole path from this Mac. The result includes your home network: the link from this Mac to the router, and the router.
- Custom gives you all the settings. The green part of its picture moves along the path, because you choose the two points.
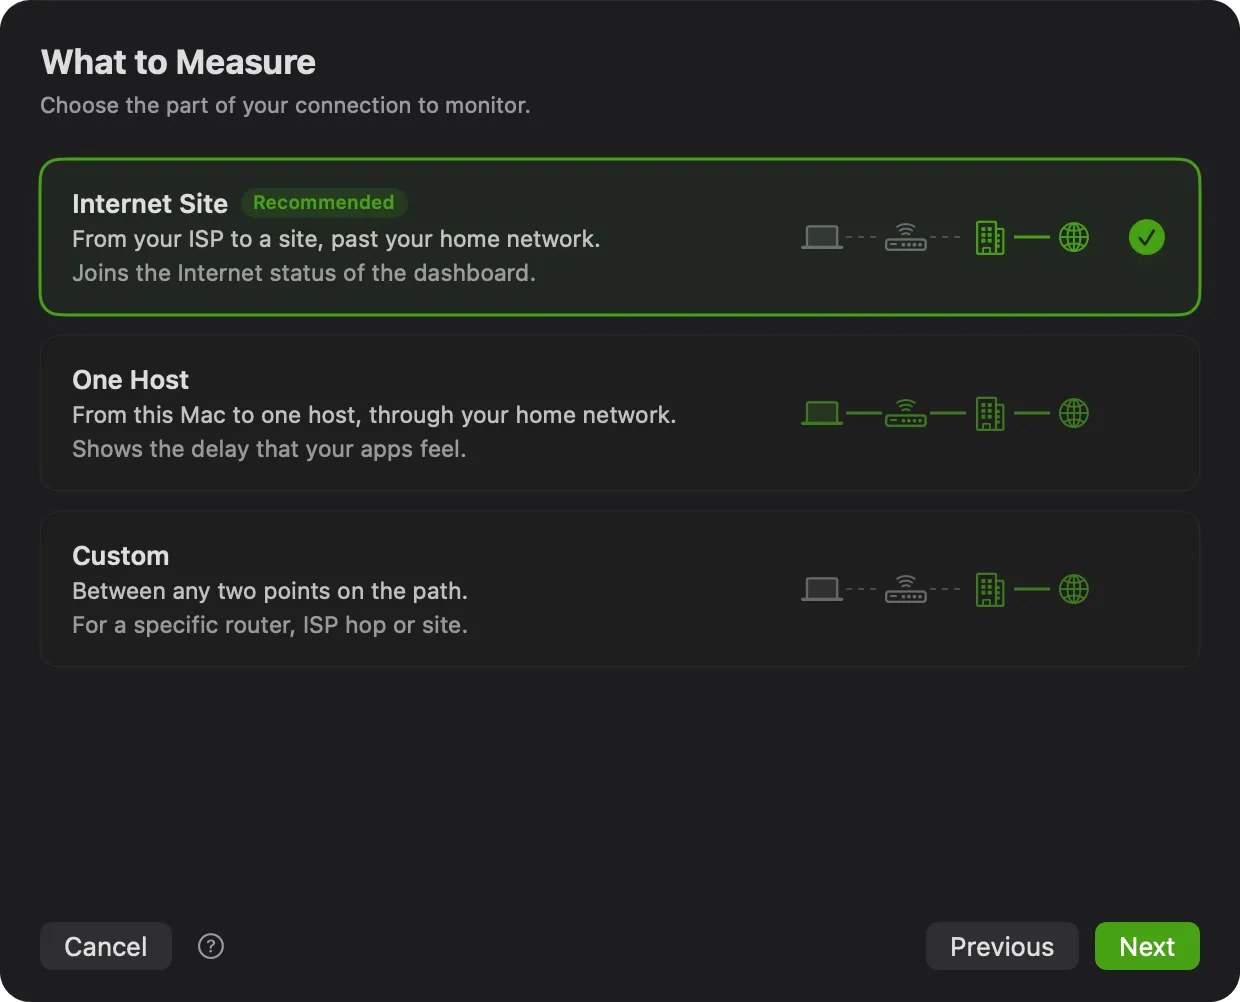
Click a card, then click Next. You can also double-click a card.
3. Set up the monitor
Section titled “3. Set up the monitor”The next page has the title Latency. It shows only the settings of the card that you chose. To choose another card, click Previous. The assistant keeps each value that still applies, for example the site.
Internet Site
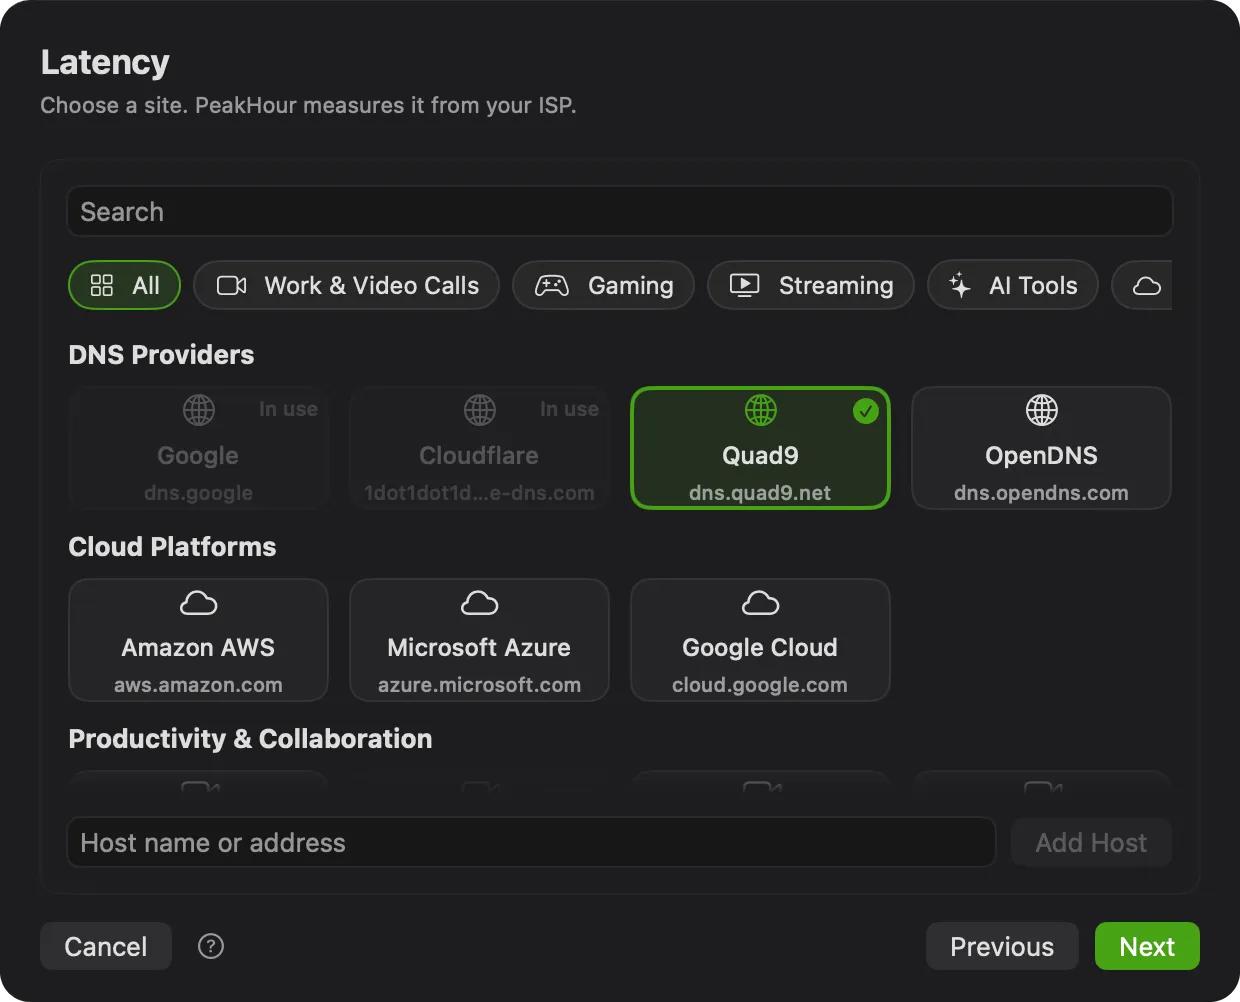
Section titled “Internet Site”Choose a site. PeakHour measures it from your ISP. The page shows the site picker of the dashboard, with the sites in groups such as DNS Providers, AI Services and Streaming & Entertainment. Click a group at the top to see only its sites, or type in Search.
- Click one site. A site that is already one of your Internet sites reads In use.
- To measure a site that isn’t in the list, type its host name or IP address in Host name or address, and click Add Host. PeakHour checks that the host replies. When it doesn’t, click Add Anyway to use it all the same. A custom site is named after its host, for example ISP to example.com.
Next is available after you choose a site. PeakHour finds the hop of your ISP automatically. To measure from a specific ISP hop, use Custom.
One Host
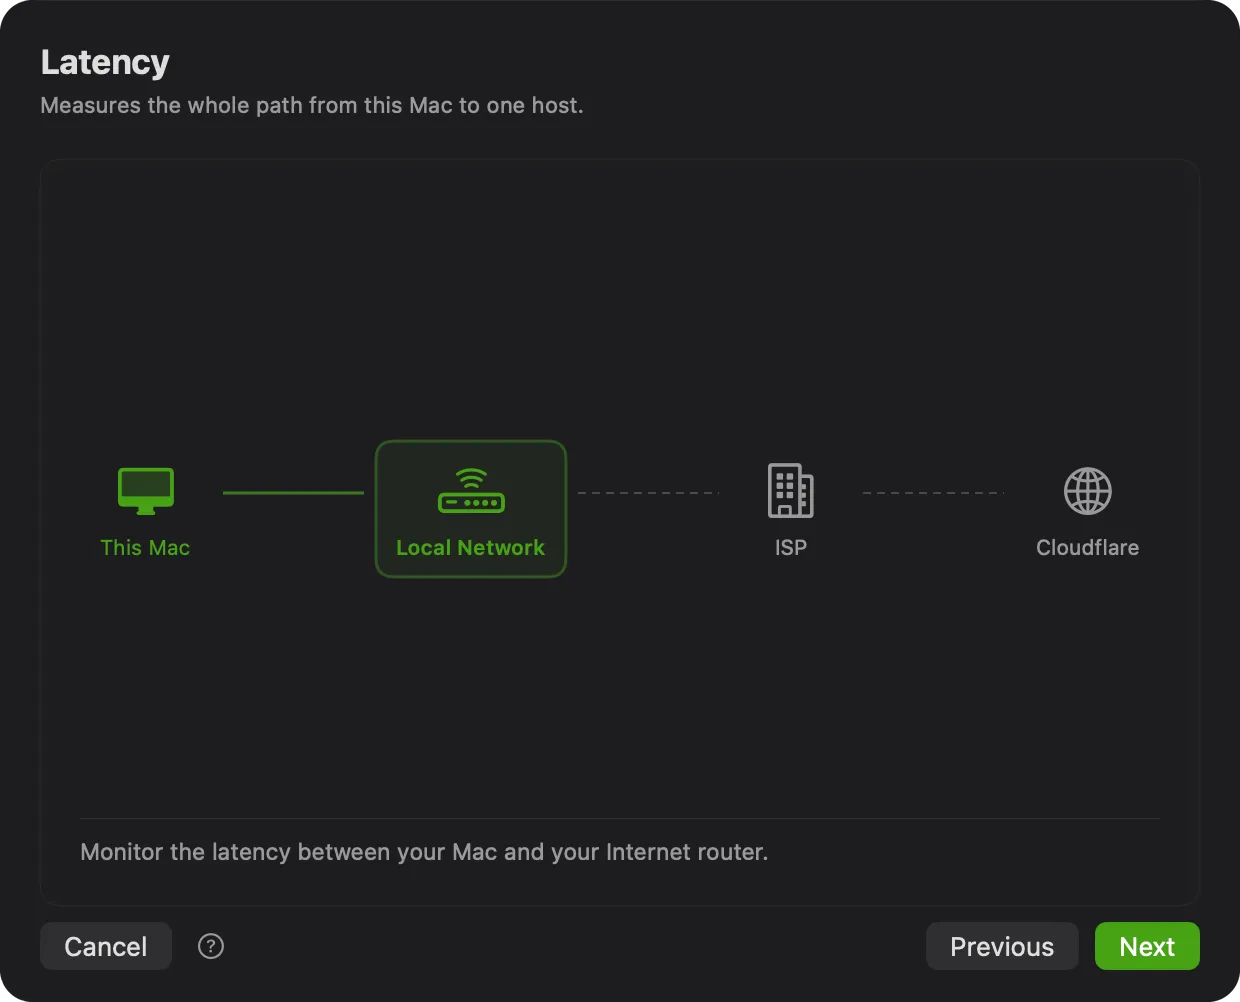
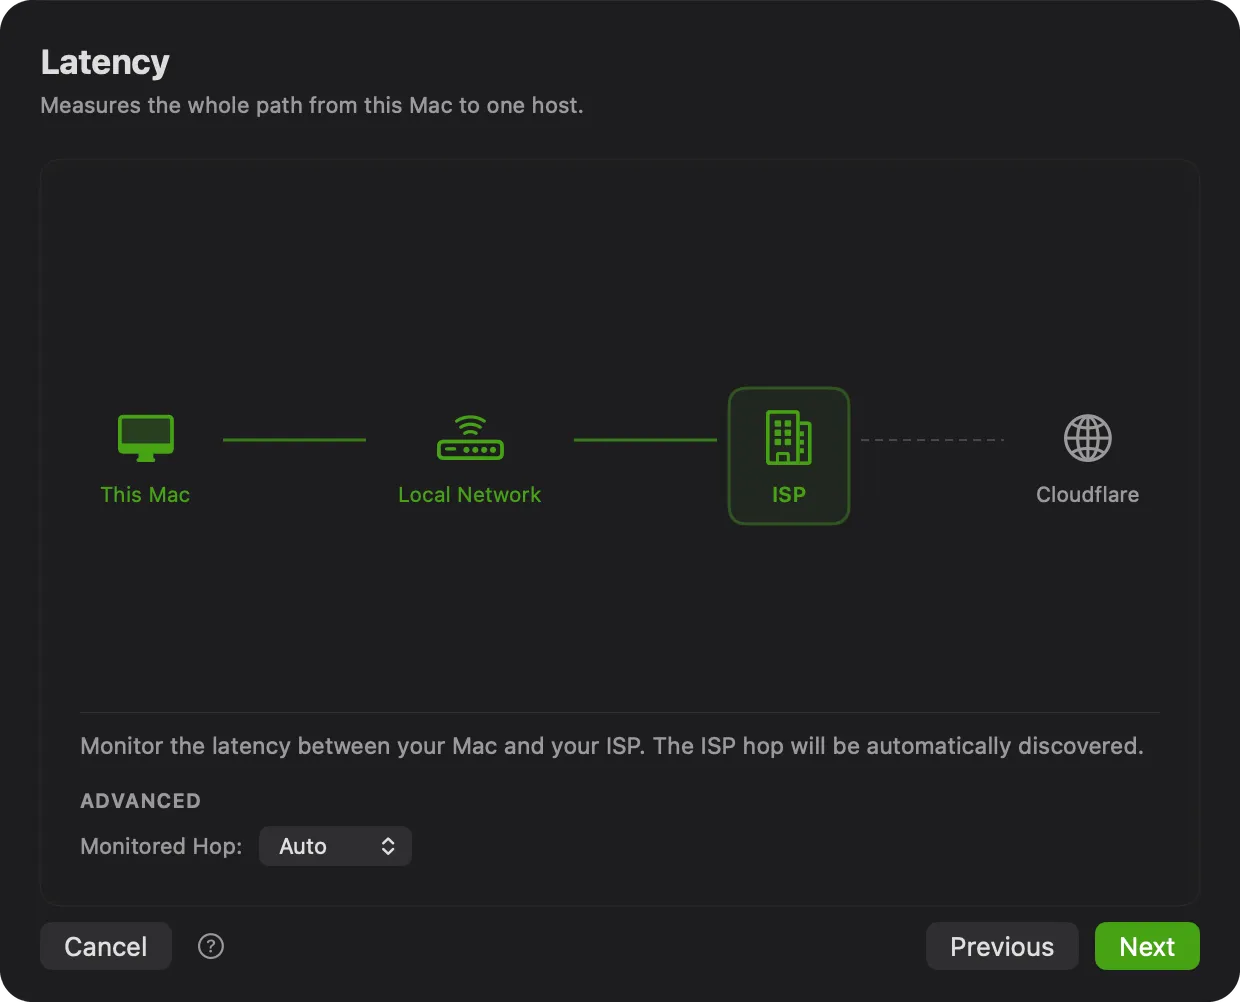
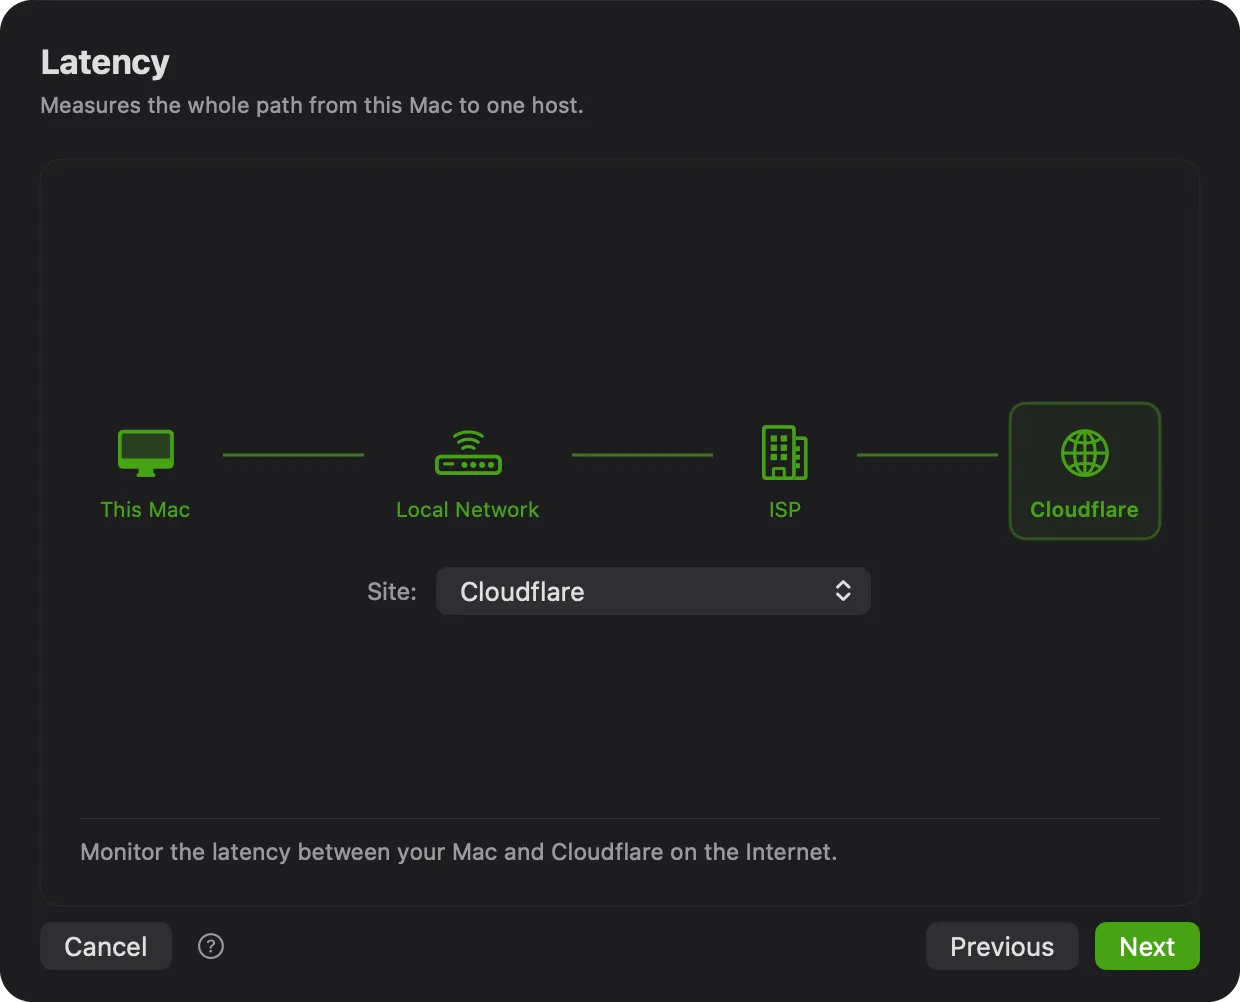
Section titled “One Host”Measures the whole path from this Mac to one host. Click the point on the path to measure to: Local Network, ISP or Internet. This Mac and each point up to the one you click are green.
Local Network
Section titled “Local Network”Measures the latency from your Mac to your local internet gateway (router) — typically the first hop. PeakHour discovers the router automatically using traceroute.
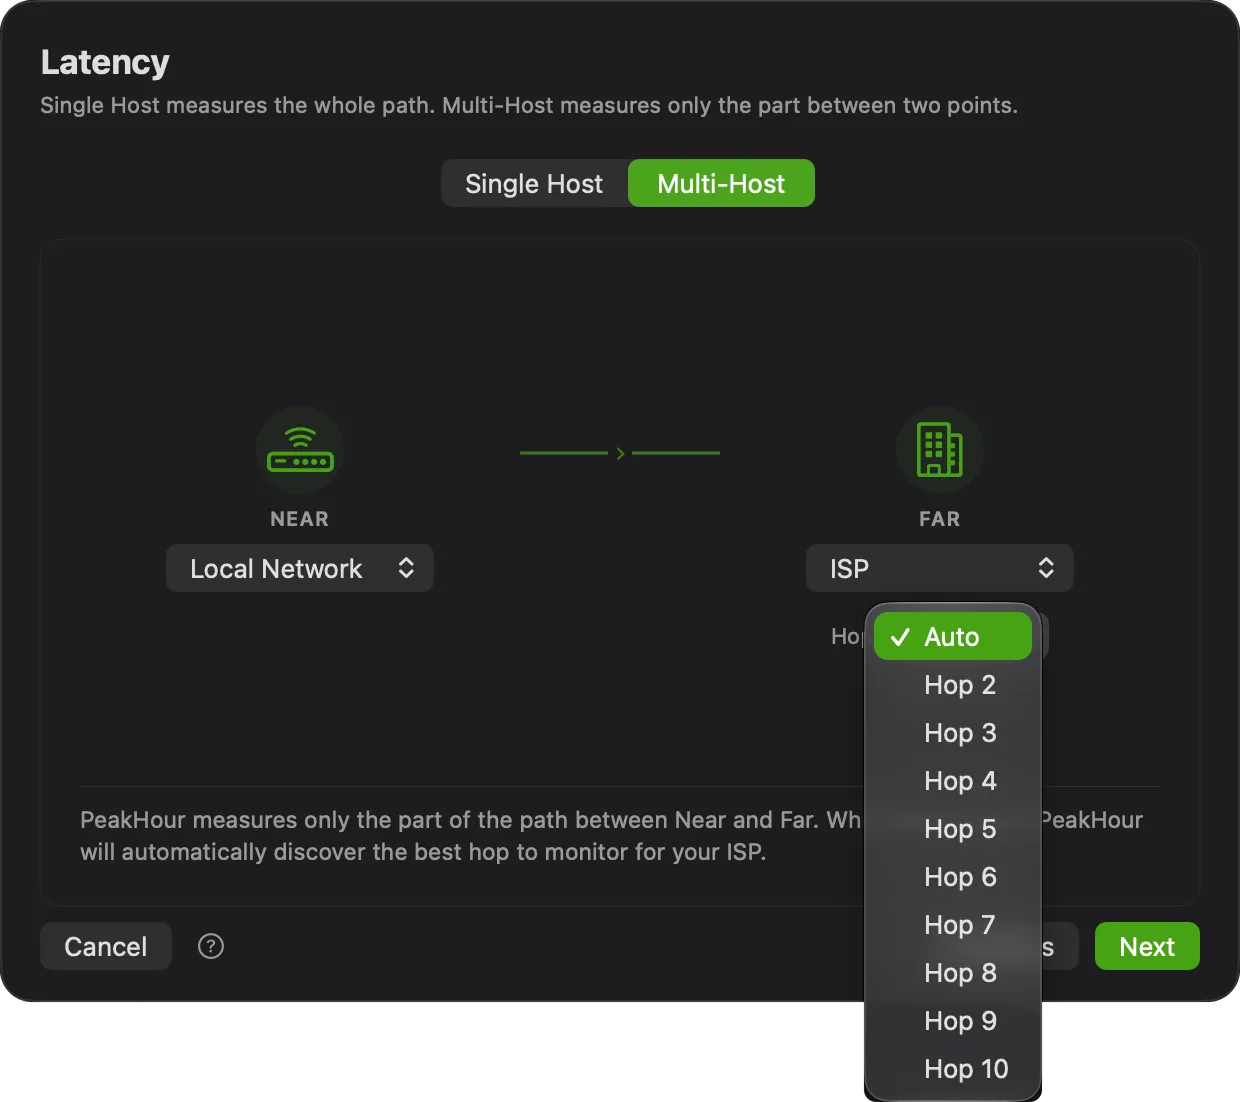
Measures the latency from your Mac to your ISP — typically the second hop. The Monitored Hop menu is under Advanced, at the bottom of the card. It is set to Auto, which finds the right hop for you. Auto suits almost every user. Set a specific hop (Hop 2 to Hop 10) only if the hop that PeakHour finds doesn’t reply to ping.
Internet
Section titled “Internet”Measures the latency from your Mac to a site on the internet. Choose the site from the Site menu. It has the same sites as the site picker, in the same groups. Choose Custom… to type a host name or an IP address. The Internet point on the path then shows the name of the site. Next is available after you choose a site.
Custom
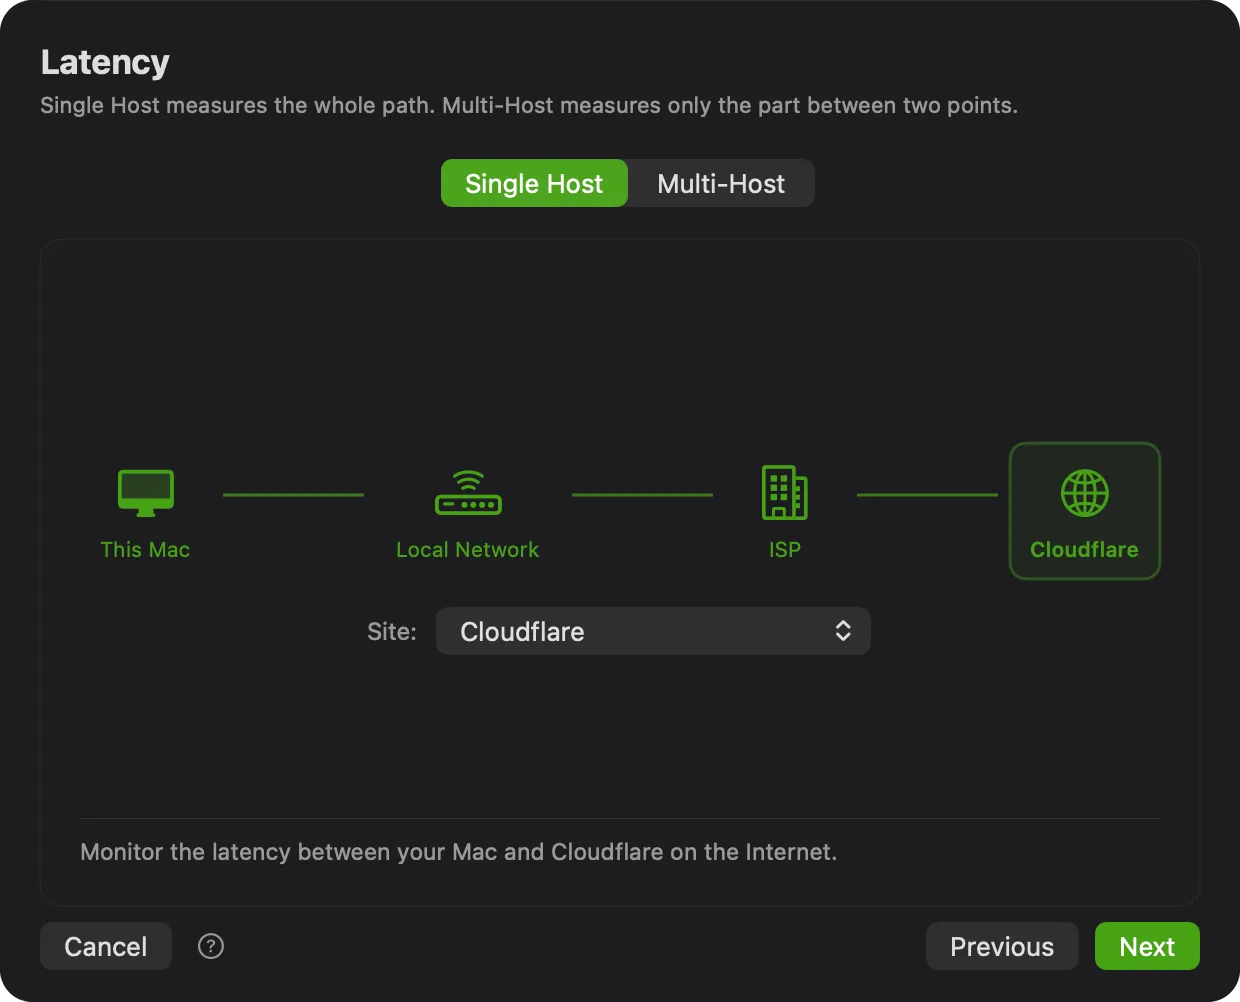
Section titled “Custom”Single Host measures the whole path. Multi-Host measures only the part between two points. A Single Host / Multi-Host control at the top of the page sets the mode:
- Single Host — the same settings as One Host.
- Multi-Host — measures the latency between two points, to isolate a specific segment of the path.
Multi-Host mode has a Near endpoint and a Far endpoint, so you can find where high or inconsistent latency comes from. This is how the Internet Dashboard measures hops like Router → ISP. Choose each endpoint from its menu: Local Network, ISP or Internet. The line between the two endpoints is green. PeakHour measures only the part of the path between Near and Far.
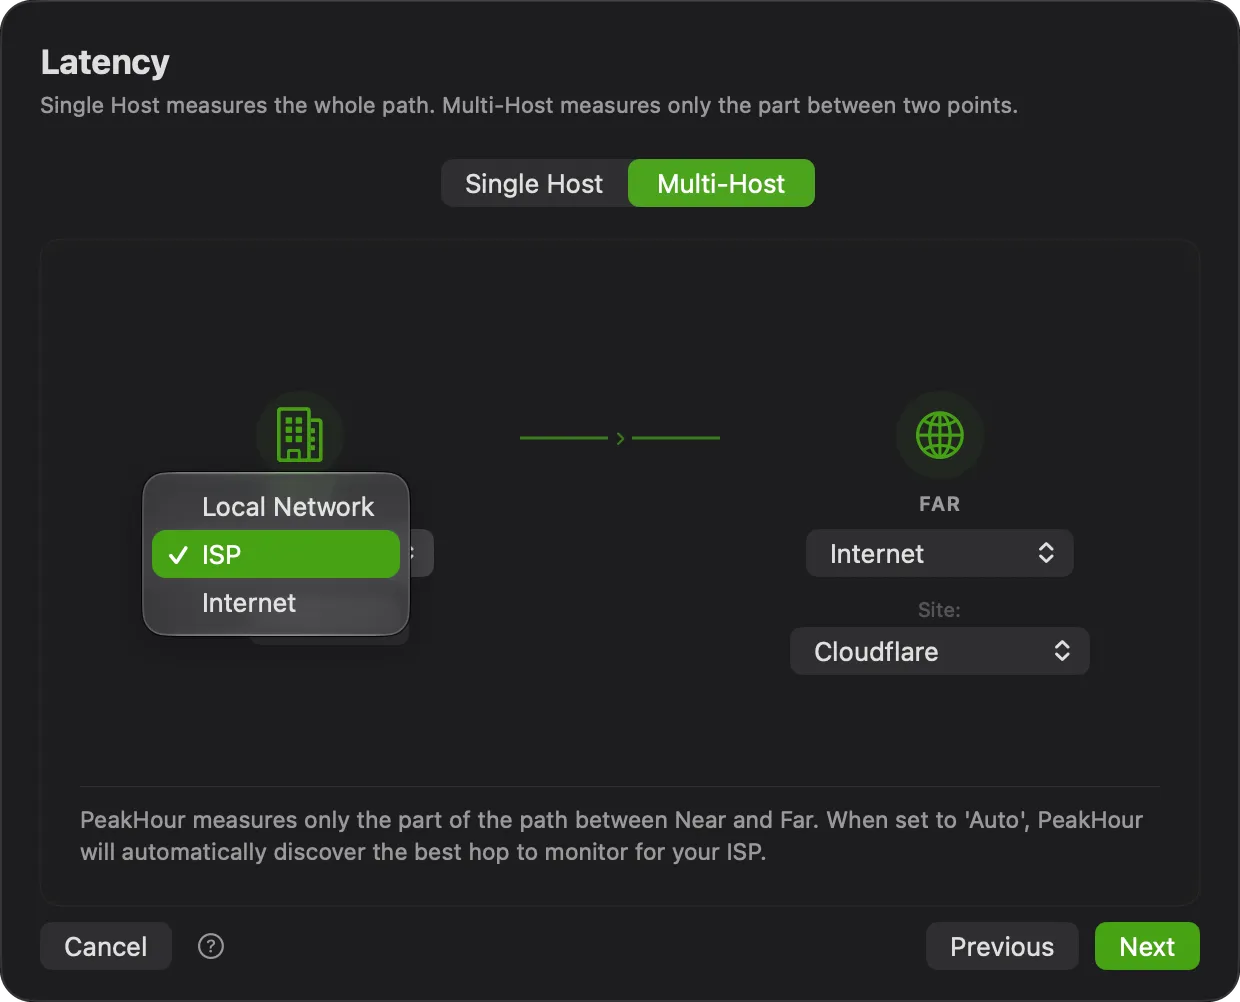
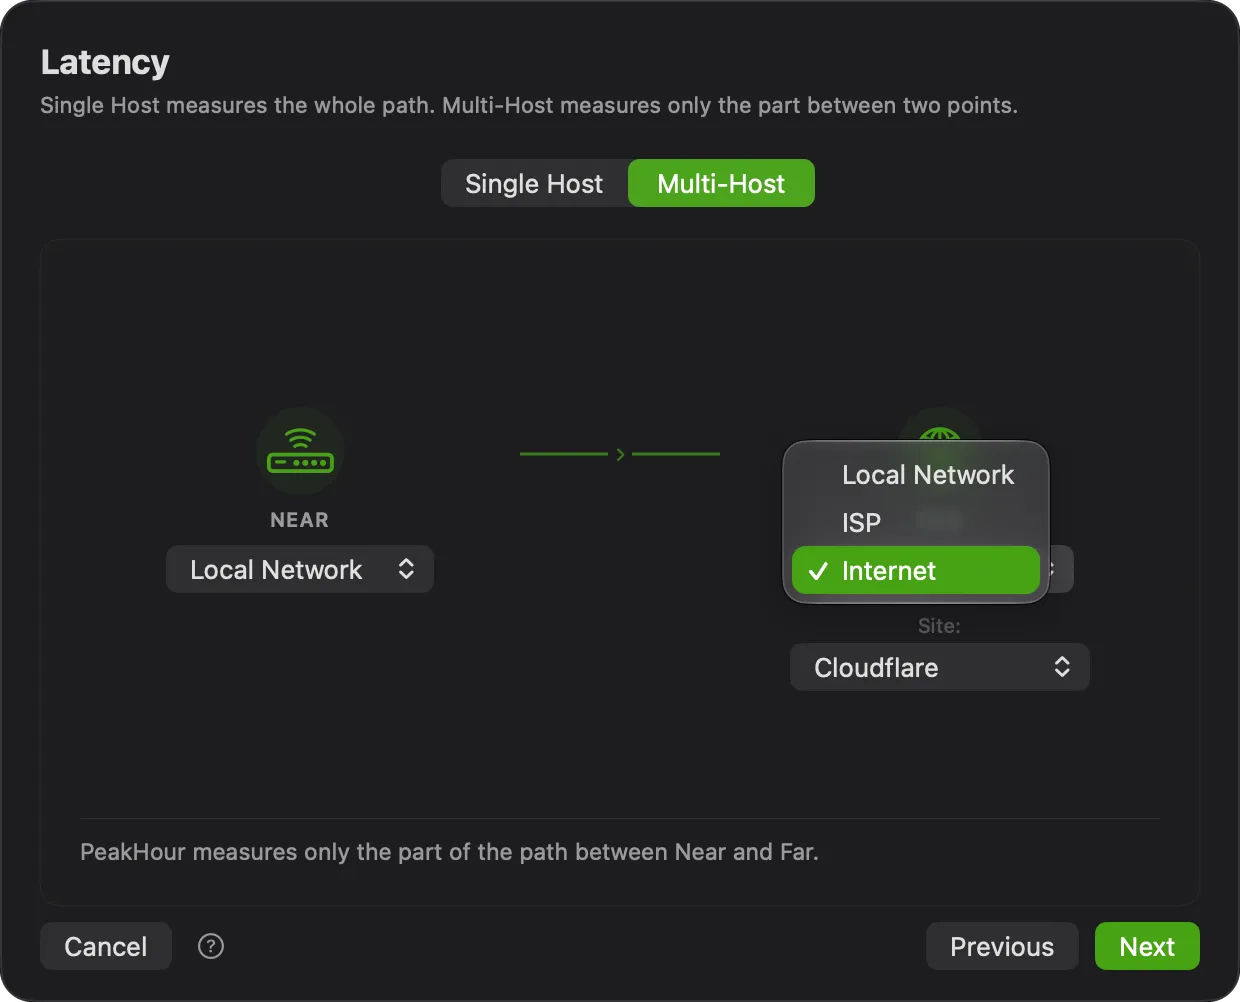
When an endpoint is set to ISP, a Hop menu appears. Leave it on Auto to let PeakHour find the best hop for your ISP, or pick a specific hop (Hop 2 to Hop 10). An endpoint set to Internet has a Site menu. When Near is ISP with Auto, Far is always Internet.
When you’ve set up the monitor, click Next.
4. Finalize setup
Section titled “4. Finalize setup”The last screen sets a few key parameters. PeakHour suggests a name from the endpoints you chose. A site from the list gives its name and its symbol to the monitor, for example Cloudflare for One Host, or ISP to Cloudflare for Internet Site. You can adjust all of these (and many more) later in Settings → Latency Monitor.
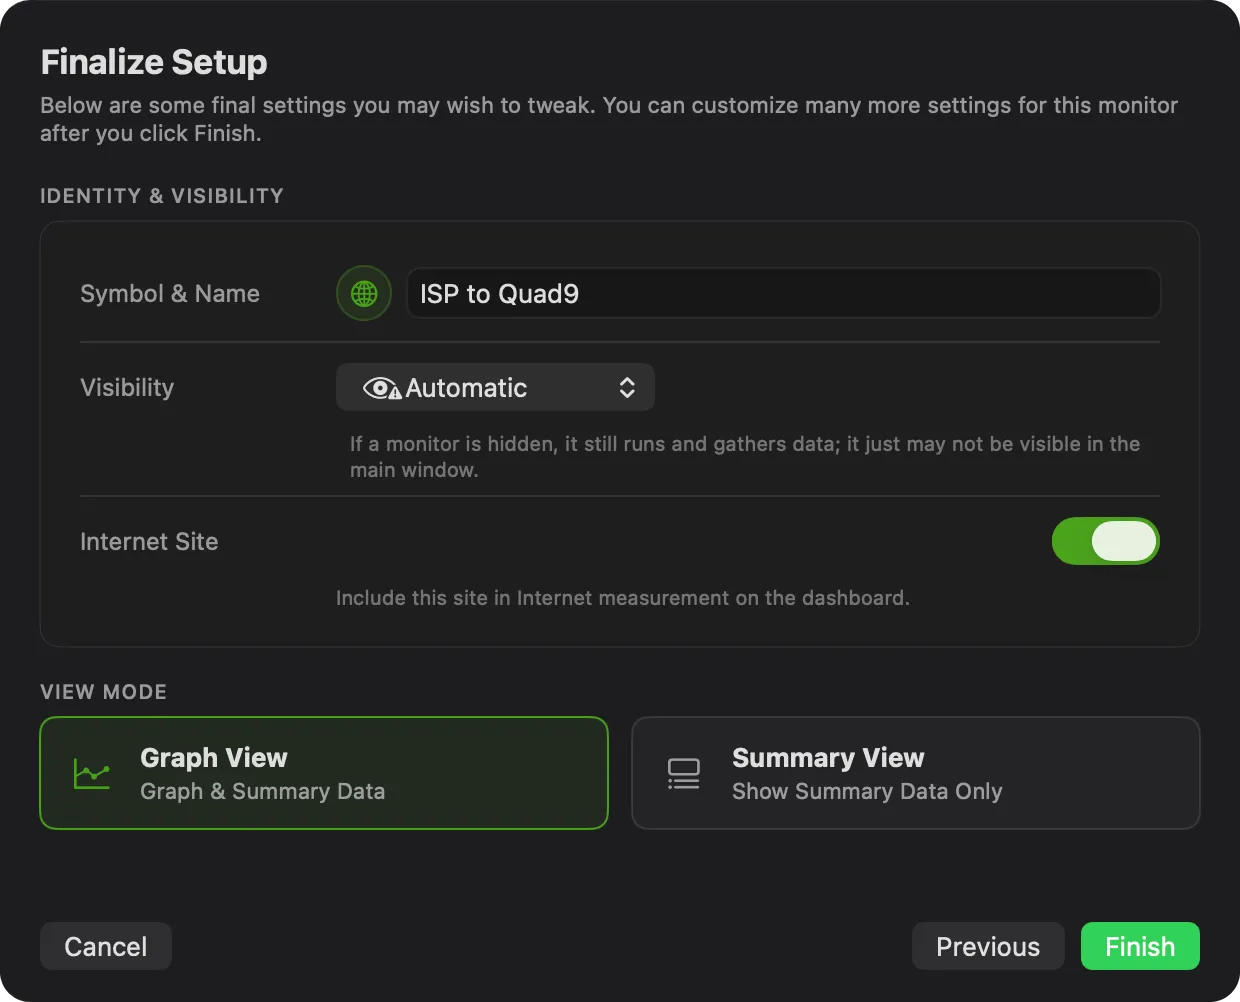
| Setting | Description |
|---|---|
| Symbol & Name | The icon and name for the monitor. Click either to change it. |
| Visibility | Whether the monitor appears in the main window. Automatic hides it when it can’t be reached; you can also force it to always show or always hide. A hidden monitor still runs and gathers data — it just may not be visible. |
| View Mode | Graph View shows the monitor with its graph; Summary View shows summary data only (collapsed). |
| Internet Site | Include this site in Internet measurement on the dashboard. It shows for the Internet Site card, for a Custom monitor from your ISP to a host, and when you edit a monitor that is an Internet site. It is on for a new monitor. When the dashboard has 10 sites, it is off and grey: PeakHour makes the monitor, but doesn’t add it to the sites. |
Click Finish. The new monitor appears in the main window and, if configured, the menu bar. To change a setting first, click Previous. The assistant goes back to the settings page of your card.
Edit a latency monitor
Section titled “Edit a latency monitor”In Settings → Monitors, select the monitor and click Edit…. The assistant opens on the settings page, with the card that matches the monitor. For example, a monitor from the ISP (Auto) to a site opens as Internet Site, and a monitor from the router to the ISP opens as Custom. To choose another card, click Previous.
What next?
Section titled “What next?”There are many more ways to customise a Latency Monitor — see the Latency Monitor settings, where you can adjust polling intervals, latency thresholds, packet count, and colors.
Was this page helpful?
Found something wrong, unclear, or out of date? Let us know and we'll fix it.